
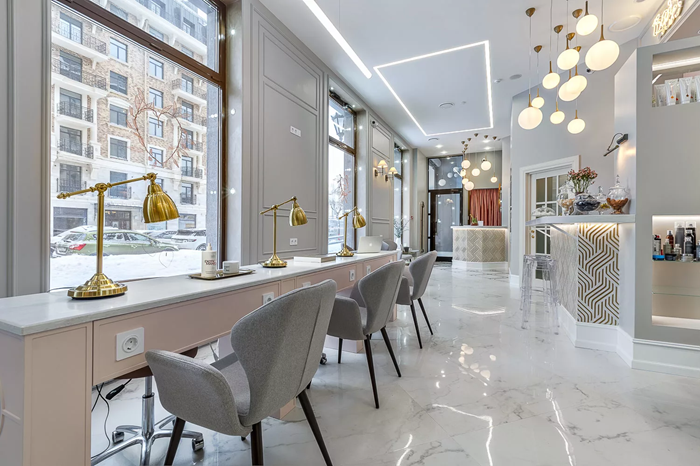
Interior photography is a way to convey a space as truthfully and attractively as possible, capturing its proportions, light, and atmosphere. The quality of these images determines how quickly a client will be drawn to a property, whether it’s a rental apartment, a country house, an office, or a commercial space.
To ensure that photographs are effective, it’s important to adhere to technical requirements and standard preparation rules: careful framing, perspective control, clean details, and accurate color rendition. Below are practical guidelines that will help you achieve predictable results.
Rules for Preparation, Shooting, and Editing
Preparation is often more important than the camera. Remove personal items, tidy up surfaces, and consider minimal styling. It’s important not to over-decorate the interior, but to highlight the advantages of the layout and lighting.
- Cleaning: glass, mirrors, gloss, plumbing fixtures, kitchen cabinets – no streaks.
- Alignment: curtains, bedspreads, rugs, chairs, decorative items – symmetrical and neat.
- Scenario: identify 2-3 key focal points (dining area, seating area, workspace).
- Windows: decide if the view is important. If it is, prepare shots that preserve the details outside the window.
Framing and Essential Angles
The series should answer questions: how is the layout arranged, what dimensions are perceived, how are the rooms connected to each other. Shoot so the viewer “walks through” the subject with their eyes.
- Overall shot: show the room as a whole, with at least two angles for key areas.
- Connecting zones: kitchen-living room, hallway-room – shots of transitions provide a sense of space.
- Details: 2-4 shots of textures and features (stone, wood, lamps, fittings), but don’t overdo it.
- Bathroom: clean angles without a fisheye lens, with clear wall and floor planes.
Technical Parameters and Shooting Discipline
For consistent quality, use a tripod and shoot in bursts with consistent exposure logic. This simplifies processing and makes the entire set of photos unified.
- Sharpness: focus so that key planes are sharp, avoid blur.
- Exposure: preserve highlight detail; Use multiple exposures if necessary.
- Wide angle: Use sparingly to avoid distorting the space.
- Consistent shooting: Use consistent shooting heights and repeatable framing principles throughout the entire scene.
Processing Rules: Naturalness and Honesty
Processing should enhance the perception of space, not alter reality. It is acceptable to straighten perspective, remove minor imperfections, neutralize colors, and even out brightness. It is unacceptable to “paint” a non-existent view from the window, change the color of the walls beyond recognition, or conceal significant flaws that could influence the client’s decision.
Quality Guideline: Series should appear cohesive, without jumps in color or contrast. If you’re comparing your presentation with references (e.g. airbnb interior examples dubai), adapt the style to the specific site, maintaining true geometry and natural light.
Room Preparation: Cleaning, Styling, and Removing Visual Noise
Quality interior photography doesn’t start with the camera, but with the preparation of the space: cleanliness, a logical composition, and control of details in the frame. The fewer random objects and visual clutter, the easier it is for the viewer to “read” the layout, scale, and character of the interior.
The goal of preparation is to create a neat, neutral, and attractive scene, where every object contributes to the perception of the space rather than distracts from it. Cleaning, styling, and removing visual noise should be completed before setting the lighting and choosing angles.
Pre-Shooting Checklist
1) Cleaning and tidying surfaces
- Dust horizontal surfaces: countertops, shelves, window sills, baseboards.
- Remove stains and smudges from glass and mirrors: windows, shower screens, display case fronts.
- Check the gloss and metal: fingerprints on appliances, chrome faucets, handles, and handrails.
- Align textiles: bedspreads, blankets, curtains, and rugs (no creases or warps).
- Hide cleaning equipment, sponges, rags, bags, and household chemicals.
2) Styling: neat, appropriate, without overload
- Determine the role of the shot: showing space (minimum) decor) or conveying atmosphere (accents are acceptable).
- Follow the “one story per zone” rule: one tray/vase/book instead of a collection of small items.
- Reduce the palette to 2-3 main shades and 1 accent color to make the interior look cohesive.
- Work in layers: basic order > large shapes > one or two small accents.
- Check symmetry and parallels: chairs, pillows, floor lamps, and paintings should appear intentionally placed.
3) Removing visual noise: what most often ruins a shot
- Unnecessary small items: chargers, remote controls, cables, documents, first aid kits, cosmetics, children’s toys.
- Random bright spots: bags, multi-colored bottles, rags, sponges, household labels.
- Cables and technical equipment: extension cords, adapters, TV and router cables – hide or neatly tuck away if possible.
- Personalization: photos, names on nameplates, magnets, notes on the refrigerator – remove for a neutral look.
- Cluttered surfaces: desks, kitchen countertops, shelves – leave some space.
Control before pressing the shutter button
Results
Preparing a room means practically adhering to the requirements of interior photography: cleanliness, thoughtful styling, and the elimination of visual noise create a “readable” frame without unnecessary distractions. The more carefully these steps are followed, the less time will be spent searching for suitable angles and the more professional the result will look during the shooting stage, not just in post-production.